Composite
A "COMPOSITE" image is useful for two (or more) 2-D images created for different parts of an experiment run (compression, heating and so on) that need to be concatenated.
Assuming you have two 2-D images (.edf) preliminary created, open the first one (usually, it is an earlier part of an experiment): from the main menu in Fit2d, click "IMAGE PROCESSING (GENERAL)", then "INPUT". In the opened navigation menu, find your first .edf file. Use UP DIR and navigation/scroll buttons (most right field) to navigate. A single click on a folder opens it (the right field shows files in a directory). Once you are in the folder single, click on your file.
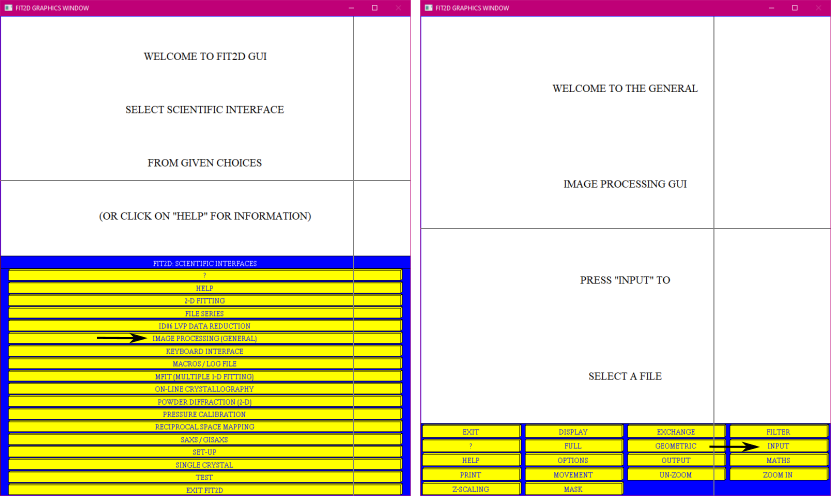
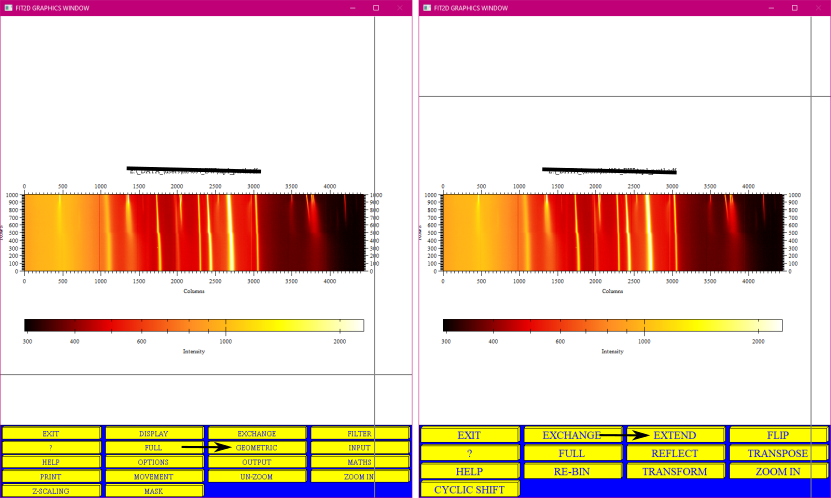
After you open the first image, click "GEOMETRIC", "EXTEND":
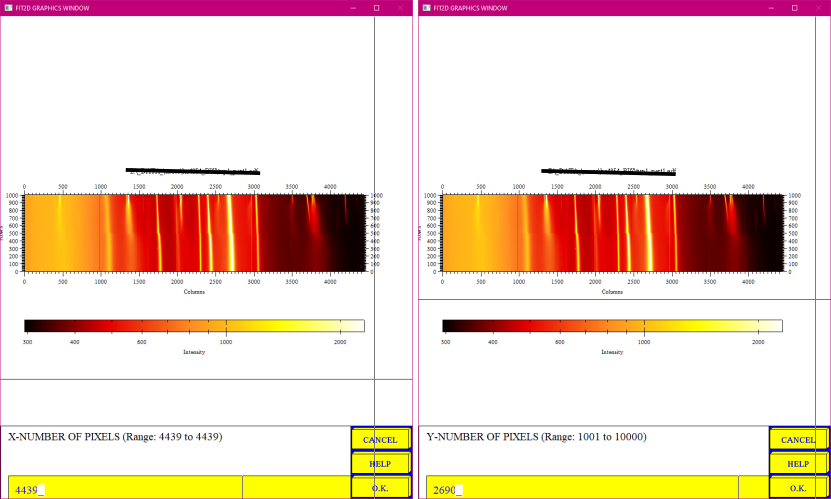
Enter the number of x-pixels (it is 4439, or do not change the number ) in the field "X-NUMBER OF PIXELS", press "O.K.", in the field "Y-NUMBER OF PIXELS" enter the total number of files (maximum scan number) you have for both parts (in the tutorial I have 1000 in the first and 1690 in the second, so I enter 2690) and press "O.K.".
Click "EXCHANGE", "INPUT" and open the second part of the image. Click "GEOMETRIC"
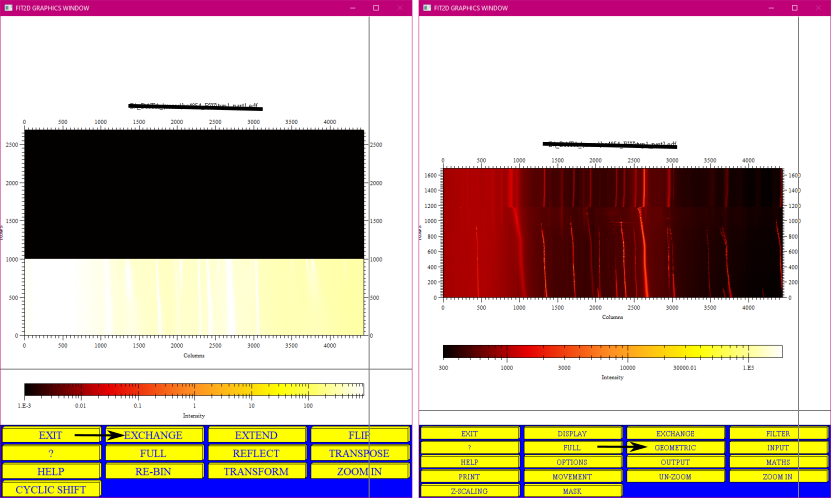
Then click "FLIP", "NO", "YES". After that, the image should be flipped (figure below, right side). Click "EXTEND". Enter the number of x-pixels (it is 4439, or do not change the number ) in the field "X-NUMBER OF PIXELS", press "O.K.", in the field "Y-NUMBER OF PIXELS" enter the total number of files (maximum scan number) you have for both parts (in the tutorial I have 1000 in the first and 1690 in the second, so I enter 2690) and press "O.K.".
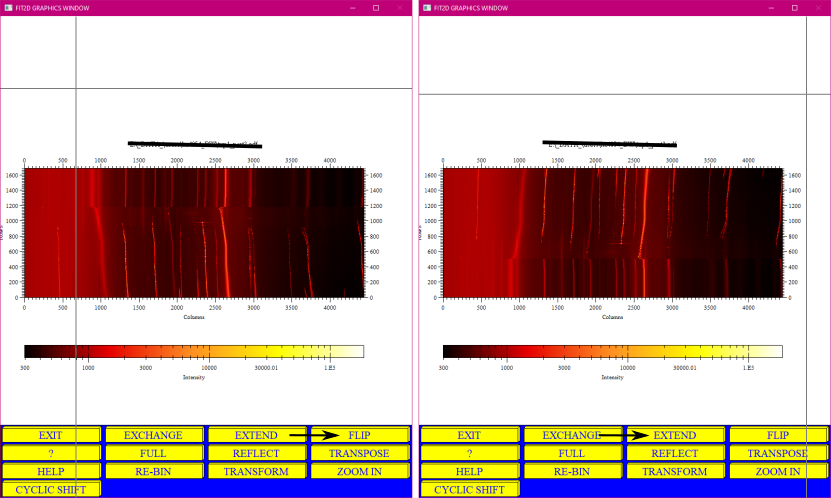
An extended image should be flipped back, click "FLIP", "NO", "YES". Then "EXIT"
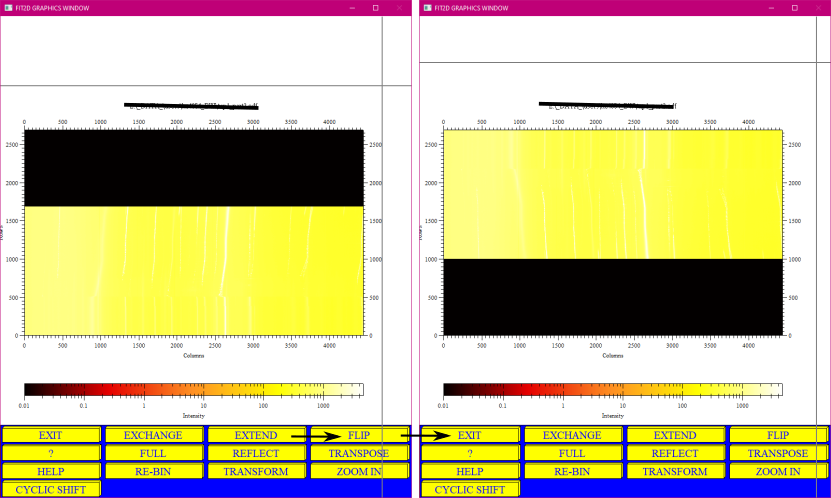
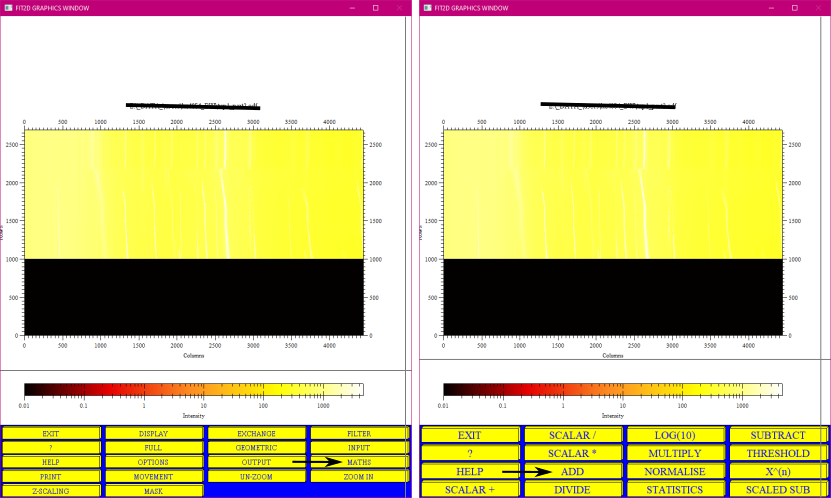
In the opened menu, click "MATH" and then "ADD"
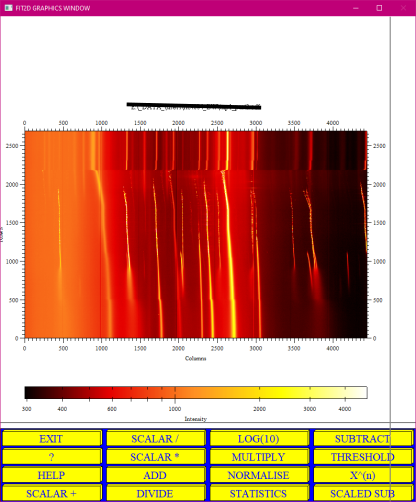
The resulted file is below. You can play with "Z-SCALING". Notice that 2theta changed back to Columns!
partners


European Synchrotron Radiation Facility - 71, avenue des Martyrs, CS 40220, 38043 Grenoble Cedex 9, France.